Wednesday, June 30, 2010

Day 13 at Jane Packer

Lesson 25 Carmen Rose

Grand Prix Rose x 11
Peacock Feather x 10
Skeleton Leaf x 18

Carmen Rose(a contemporary design): is a build up of a rose by adding petals to make into a 'BIG' rose for a hand bouquet.
Step 1: Cut the Peacock feather short, wire and wrap with tape(32wire).
Step 2: Overlapped 3 Skeleton leaves, wire at the base and wrap with tape too(32wire).
Step 3: Bend 30 pcs of wire 32 to desired 'M' shape(see photo)
Step 4: Select the best rose for the center piece.
Step 5: The remainder 10 roses, peel off the bad petals, and select 3 large, 3 mid and 3 small petal from each rose. Separate the 3 pile of rose petal for easy usage later.
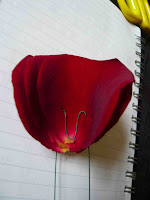
Step 6: Overlap he 3 small petals and poke the 'M' shape wire through(as shown), continue through the 3 pile of petal.
Step 7: Use 90 wire for the main rose and secure with wire 32 on external, again wrap with tape.
Step 8: Start adding on the main rose with the 'small' pile of petal, make sure you push from below upward the 'main' rose's petal, keep adding on the petal.
Step 9: Keep the distance and all the wire straight where you hold the rose and the petal arrangement.
Step 10: after all the petal, add the peacock feather all around the Carmen Rose.
Step 11: at the base of the arrangement, add on the skeleton leaves.
Step 12: Hold the stand of the bouquet & make sure you left about 2 cm from your hand, trim off the rest of the wires except the the center 90 wire, leave another extra 2 can, will need it to hide the ribbon later.
Step 13: wrap the ribbon from the middle downwards until you cover the 90 wire, then bend the wire upwards and wrap the ribbon upwards now. In this case the base is wrap up cleanly. Circle the ribbon all the way up. Cut the end off and put 3 pins on to end the arrangement.

This arrangement didn't receive good remark from all of us. May be without the peacock feather...

Lesson 26 Oasis Shower Bouquet

Vanda Orchid x 4
Cool Water Rose x 10
Hydrangea 'Express Blauw' x 1
Eucalyptus Cnerea x 1 bunch
Water File x 3
Aspargus Ex. Ver x 10(文竹)
Step 1: Secure a piece of dry Oasis on the table(see photo), Fix the handle into the Oasis for easy arrangement.
Step2: Start the Eucalyptus from the bottom and work to the side.
Step 3: Same for the Aspargus from the base look out for a best 'tail'. work the Aspargus in between the Eucalyptus, follow by Vanda(cut the stem & place in the tube), Roses and last Hydrangea to fill the gap...
The Hydrangea 'Express Blauw' is smaller and look better in the hand bouquet.

Tuesday, June 29, 2010

Day 12 at Jane Packer

Lesson 23 Circlet
Cream Gracia Spray Rose x 5
Hyperium 'Magical Beauty' x 5 (berry looks alike)
Ivy Plant x 1 (20 leaves)

Both 20 Ivy leaves & 30 roses use wire 22. Use 2 number of 90 wire join them together, overlap the join by 1 cm. Taped them together. Again wrap from top down. Once done, create a loop at the tip of the wire, tape it down again. Start with a bigger Ivy leaf to cover the loop. Add on the rose, Hyperium, rose...stagger the roses the ivy and so on... end with another Ivy leaf, create a hood to join the loop. Adjust the Circlet to desire shape. It's DONE.

Lesson 24 Pomander
Red Sansation Rose x 15
Sphere (Oasis Ball) x 1
Ribbon

Note: Flower that work well with a Pomander
Carnation, Spray Roses, Hydrangea...
Step 1: Tap the wet Oasis, make sure it's left to soak in water fully and not dripping with water.
Step 2: Tape the Oasis ball around cross both tape...
Step 3 Prepared the ribbon, use 70 wire. poke through the joined ribbon, use long side of the wire to wrap around the ribbon, keep both wire straight. Tape around the wired part(avoid the ribbon from getting wet). Poke the ribbon wire right through the Oasis ball, re-insert the wire back to the tape of the ball.
Step 4: Prepared 2 wired ribbon for later usage.
Step 5: Hang the Oasis up and ready for the arrangement. First start the roses from one side, one by one to go around a full circus, then repeat the same from the opposite. By doing so, it help to balance the arrangement, then start filling up with the rest of the roses, you can fill the gap with the rose bulb for more natural look. Placed the 2 ribbons at the side of the ribbon hood.

I would love to try this arrangement with other flower and other sizes too...:)

Monday, June 28, 2010

Day 11 at Jane Packer

Lesson 11: Wedding Foundation
Morning session: 
Flower Condition
Flower Wiring

Sample of different thickness of Wires you will need... 90, 70, 32, 22 with these few sizes you should be able to cover most of the wedding arrangement. 
Most prefer tape to use is the Green Nylon to paper tape, which is stretchable, easy to wrap and keep the wire thin after wrapping.
How to wire?
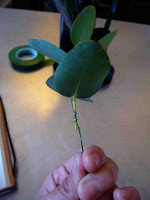
Internal wired: For hard stem like rose, cut stem to about 1 cm, poke wire through the stem use 90 wire
Semi-internal wired: Is for Tulip, Gerbera. For Tulip poke through the stem to the top and make a hook and pull down and hide the hook. For Tulip, poke a 45 degree upwards, go around the Tulip stem. Use a 70 wire.
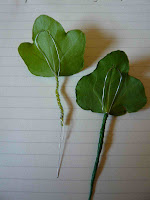
External wired: Normally use for foliages and also roses... use 70 wire, poke through, the longer wire go around the stem.
After all the wiring, use green tape, taped about 3 rounds and work your way down to the stem...

Break for lunch, today joining the Korea girls to the afternoon Cheese tasting.
Heading towards the famous LA FROMAGERIE

We just let our culinary expert Lea do the ordering, she is fantastic, we had a French cheese plate, and the above which i had no clue what she is ordering for the four of us. Well, we also share a egg sandwich & a roast beef sandwich... and a bottle of white wine... that was by far one of the greatest lunch i ever had during class lunch time. Must say the afternoon wiring session is quite struggle for me... trying to keep awake.......

Afternoon Session: 
Calla 'Chrystal Blush' x 1
Vandela rose x 1
White Lydia Spray Rose x 2
Foliage
China Gras
Galax
Ivy Plant

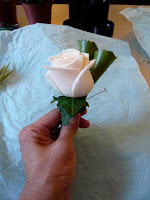
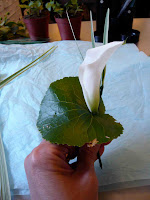
After all the wiring finally 4 creations. Well, first wedding wiring attempt, not so bad. Last one was my creation with the left over...:)